Tear Sheets

Thursday 19 April 2012

Playing Catch-Up: FOTDs 11 and 13

Hey guys!! So I got these two FOTDs to share with you guys!!

These are Days 11 and 13 on the FOTD Challenge Calendar.

Day 11: All about liner. I kept this wearable because I was going to visit a bridal client and I didn't want to scare her away with crazy makeup!! LOL This look is actually deceptively simple, and not product-heavy at all.


On my eyes:
MAC MSF - Soft & Gentle all over the lid and under the brow bone
MAC Eyeshadow - Green Smoke in the crease
MAC Fluidline - Blacktrack (in waterline as well)
Covergirl Lash Blast Fusion Mascara - Blackest Black
NYX Eyebrow Cake Power - Dark Brown


On the Rest of my Face:
MAC Pro Longwear Foundation - NC40 mixed with MAC Select Cover Up - NW45 (I've got quite a tan and the NC40 is just far too light for me now)
ELF Complete Coverage Concealer Palette - Medium
NYX Loose Powder - Cancun Tan
La Femme Blush - Sienna
Avon Glazewear Intense Shine Lip Gloss - Maple Sugar


I really, really, REALLY loved this look!


FOTD Day 13 was themed "Mod". I've never thought that the mod look was good on me, because it's so very matte, but I decided to give it a whirl anyway! I was in a hurry to a gig and so didn't take a lot of photos.


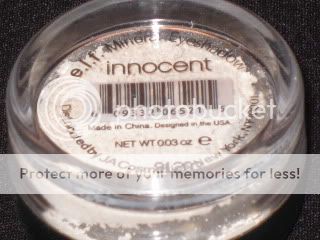
On my eyes I used ELF Mineral Eyeshadow in Innocent, Avon Big Color Eye Pencil in Night Glisten and MAC Carbon, and then lined with MAC Fluidline in Blacktrack and L'Oreal Extra-Volume Collagen Mascara. I lef the brows fairly "undone" since they were either left totally alone or drawn in very thin and round. I skipped drawing in the "twiggies" on the lower lash line. I also made the eyes shape a little more modern by "winging" the crease shadow as well as the liner, whereas a true Mod look would have kept a very exaggerated, rounded eye socket shape. I kept my cheeks soft, matte and slightly rosy.


For lips I used a matte pink lip stick, but I applied it somewhat sheer, over chap stick.


In all I'm not too mad at how this one came out either!!


Happy Challenges!! Remember, it's all about fun!
Mandy

The Nude Truth

Yesterday's FOTD (Day 18) Challenge theme was "Nude".

Now I'm fairly sure that Nymphette didn't mean it literally, but that's how I decided to do today's face. Nude. Bare. Naked.


Here I am, naked-faced, freshly scrubbed and clean from the shower. I swear to you that all these pictures are completely unretouched. I took all of these with my Nikon Coolpix digital camera, under a 100-Watt Daylight bulb, and with flash.

I'm in the process of learning to love my bare face. I think it's a struggle that all women (and men, of course) face at some point in their lives because from the time we're 12 we see these perfect faces in magazines. We know intellectually that those faces are airbrushed up the wazoo, but it doesn't change the fact that these are the images we're being presented with that are deemed "beautiful" in society. It's as if magazines, the heralds of the fashion industry, are telling us that "in order to be beautiful you must have flawless skin, no red in your eyes, not a hint of crack in your lips. And you better believe that if anyone is going be put on our magazine covers she will be altered digitally within an inch of her life so that she fits this criteria." 

Perfect skin, perfect teeth, perfect nose, perfect makeup, perfect, perfect, perfect, perfect. And girls grow up with this impossible ideal as the measuring stick they hold their own image up to.

I've never had what I thought to be "good skin". My skin breaks out easily with those large, painful pimples that leave horrible scars. I've finally found a way to calm them down and the scars have begun to fade but my skin is still far from perfect. My eyebrows are sparse, my eyelashes thin and wimpy. I have a crazy massive forehead, weird broken capillaries around my nose, an uneven complexion, open pores on my cheeks, small eyes, wrinkly lips....I could go on and on and on about my imperfections. For a long time, I did.


People would tell me I was beautiful, but I never believed them because They were seeing the made-up me. The me that never left home without mascara, eyeliner and lip gloss at the very least. There came a point in my early 20s when my skin was so bad I would never even come out of my room without foundation on. I was convinced I looked like a monster. And no matter what your face looks like, if you feel horrible, you're going to project that into the world and that's what people will see. And that's how I felt.


Before you scoff, it's important to understand that this is not about vanity. The face is the first thing people see. It's how you read people, it's how you remember them. And it's easy for us to get to a point where we feel that our faces are our only real advertisement, since people make immediate snap judgements about us depending on what we look like, whether or not we're wearing makeup, etc. We tend to judge others very harshly, we all do it or have done it in the past. And the sooner we all admit that to ourselves, admit that we can be an extremely, painfully superficial lot, understanding that this is how we have been taught to be for generations, and it doesn't make us bad or good, it's just the plain truth, the sooner we can begin to get past it.


I'm not sure when the transformation of how I feel about my face began. But at some point, recently enough that I'm still aware that my thought process is different than it used to be (in other words it hasn't quite become completely effortless yet), I began to realize that my face is just my face. The good and the perceived "bad". I also began to fine tune the way that I feel about the concept of "beauty" in general, and I began to be much more comfortable in my skin. I stopped giving away my power by taking oh so seriously what the image industry said I should look like or what mean, horrible people said about me and my skin, my looks, my weight, my hair, whatever. By letting all those outside of me dictate to me how I should be feeling about the face and body I was born with, I was giving away all of my power. So I took responsibility for giving away my power, and then I took my power back.


One day I took a photograph of my bare face and studied it. And I realized that I really do like my face. I think I'm beautiful in my own unique way, as everyone is. I have always steered very clear of the word "ugly" because beauty in of itself is so subjective and I hate to put that on anyone. And I truly have yet to come upon a face that is really what I would call "ugly",  but I was subconsciously calling myself ugly. And so I cut myself some slack and now, at 30, I can proudly say that, all in all, I really do like my face. I'm ok with my "flaws". I've even learned to love the widow's peak that I absolutely loathed all the way through my teens and 20s. After the birth of my daughter I cut my hair, which was a 20-inch security blanket that hadn't been cut, only ever trimmed, since I was 8 years old. With much less hair, I had no choice but show off my face. I even began to leave the house without makeup, long before my skin began to clear up. Much of it was conscious decision-making, like not wearing makeup, and the rest was just my mind following my actions.

Here's what I do like about my face: I love the colour of my skin, the shape and colour of my eyes, my strong, high cheekbones, the shape of my nose, the firmness of my skin, my few freckles, my unique moles, my smile, and the fact that my eyebrows are naturally nicely shaped.


 In a nutshell, here's how I think about Beauty and Image:

  • I believe that we are all beautiful. In a world where everything is so different, how can we hold up one standard, impossible or not, and expect everyone to conform?
  • I believe that you should take care of your skin and your body and your face not because you need to do so in order to make yourself into someone else's idea of beautiful, but because they are the only skin, body and face you have, and I believe they should be treasured.
  • If we spent half as much time appreciating our faces as we do looking at magazines that give us false images as our ideals, we would be so much happier. 
  • Makeup should never be used as a mask to hide your real face because you think there's something wrong with it. Makeup is fun, it's a way to be creative and to enhance the parts of your face that are your favourite. Makeup is an art, a tool, a toy; not a remedy, a cover-up or a miracle fix-all.
  • When you are confident, you immediately appear more beautiful. The mind is an amazing, powerful thing.
  • You can create any image you want. Define your own image completely separate from what magazines and the unforgiving "Beauty Industry" tell you that you should want to look like. Decide what is beautiful to you and pursue it.
Dare to go bare! You are perfect in your imperfections, for we are all imperfect, and that is what makes us wonderfully unique.

Mandy


Wednesday 18 April 2012

Playing Catch-Up - Milky Way Nails

I'm so very behind...I've got two FOTDs and one NOTD for you guys!! I'll start with the NOTD since they're the most recent - I just finished this mani today and I love it!!

I just spent a few nights at a beach house with some friends on the East Coast of BArbados. It's gorgeous out there, and at night, because there aren't as many lights, the night sky is absolutely breathtaking. You can see all the stars that you normally can't see, and you can actually see the wave of the Milky Way. So I drew my inspiration from that and came up with this mani. It's taking the Ombre technique to the next level. There's definitely a gradient of colour, as you can see, but I've got a ton of texture in there with three different types of glitter polish in layers!


 These are the polishes I used (along with Orly Bonder as a basecoat and Seche Vite Top Coat) From left to Right (which is the order in which I applied them): Milani - Black Magic, Slick Holographic Glitter polish - No Name, Milani 3D Holographic - HD 509, and NYX Nail Polish - 162 Fizzy Spots.

I applied one thick coat of Black Magic and let it get almost dry. Then I used a makeup sponge to apply a thin layer of the Slick polish, which is a mix of small and medium holographioc glitters in a clear base, not terribly dense, on the top two thirds of the nail, let it dry, and repeated that on the top half of the nail. Then I used the Milani 3D, a very dense, fine holo glitter polish, on the sponge along the top third of the nail, let it dry, and repeated just along the free edge of my nail. When that was completely dry, I gave the entire nail one thick coat of the Fizzy Spots. It's large hexagonal holo glitter and a small holo glitter mixed in a black jelly base. I wanted to tone down all the other silver a bit, and also if you apply the Fizzy Spots too thin the large hexagonal glitters won't transfer to the nail.

Try it out! This would look awesome on a dark blue or purple base as well. Have fun!

Happy Milky way nails,
Mandy

Friday 13 April 2012

NOTD: Blue Ombre!!

Maybe I was inspired by Day 10 of Nymphette's FOTD Challenge, because today when it came time to do my nails, I immediately thought of doing an Ombre Manicure!

Ombre nails is an awesome trend that's been gaining popularity for the last 18 months or so. It started with just creme or matte colours, moving from light to dark, with the lightest colour being on the thumb. Then people started reversing it, and now they're also doing ombre as the gradation of colour on each individual nail. Of course, shimmers, glitters, duo-chromes...no polish is off limits for this look!

I started with a coat of Orly bonder Rubberized Baseecoat. I then chose Blues for my Ombre nails, and I went for polish with a slightly shimmery or sateen finish. The colours I used were (from left to right, in order from thumb to pinky):

Milani - Pool Party (3 coats); Color Club - Emerald Depths (2 coats); Milani - Bolting Blue (2 coats); O.P.I. - Yoga-ta Get This Blue! (2 coats); Milani - Midnight Satin (3 coats).
The Pool Party and Midnight Satin are fairly thinly pigmented polishes but I got full opacity in 3 coats of each. Midnight Satin is one of my favourite colours for a quick, dark-but-not-black manicure!

And I finished it up, as always, with a coat of Seche Vite Quick Dry Top Coat. Here's the finished manicure!

Indoor, natural light, no flash

 Indoor, daylight, with flash

I am LOVING this manicure!! I think I'm going to try another Ombre look, this time with the gradation on each nail. And I think I"ll use purples for that.

Don't forget to check out my YouTube Channel, and Like and Subscribe and Share! 

Blue Ombre hugs,
Mandy


Thursday 12 April 2012

FOTD 10 - Ombre!

Ombre is a HUGE trend right now. It started on the nails and the hair (more subtly) and has made its way to the eyes and lips. It's basically the gradation of colours in the same family, from light to dark. More advanced looks with fade from a dark red, for example, right through orange and end at yellow or white, or perhaps from navy blu, through purple, light blue and teal, ending at a minty green. Really, you can do whatever you want, but the gradual transition of the colours is the key to this look.

So for the FOTD for Day 10, I kept it wearable, since I was actually going out to work right then, with this face on. (YEAH!!) I went for a black-through pewter-through taupe-to white combination for my eyes and almost black through plum to red for the lip. I actually skipped the foundation for this, because I just felt like having light, nude skin. I only concealed under the eyes, around the nose and a few blemishes, and then I powdered the face, and applied blush through the back of the cheek rather than on the apples, so that the cheeks wouldn't compete with the rest of the face. I highlight the cheekbone lightly.

Products used:
NYX Jumbo Eye Pencil - Milk
MAC Eyeshadow - Carbon
Almay Trio for Hazels - 023
NYX Eyeshadow - Root Beer
NYX Eyeshadow - Geisha
MAC MSF - Soft & Gentle
MAC Fluidline - Blacktrack
NYX Eyebrow Cake Powder - Dark Brown
La Femme blush - Sienna
Avon Luxury Lip Liner - Deep Plum
L.A. Colors Lip Liner - Deepest Purple
Wet N' Wild Creme Lip Liner - Berry Red
Black Opal Lipstick - Ebony Wine
Avon Color Rich Lipstick - Cherry Jubilee
NYX Lipstick - Black Cherry
NYX Lipstick - Chaos
ELF Complete Concealer Palette - Medium
NYX Loose Powder - Cancun Tan

Unfortunately the flash kind of KILLED my eye makeup and de-saturated the lip a bit, but you can still sort of see what I was aiming for!


Love and sexy Ombre kisses!
Mandy


Quick Modern-1930s Manicure

A little while ago I was all enamored of the 1930s Manicure and I did a Classic version using black and silver polish. Right after that I created this more modern version of a 1930s Manicure using the same silver as the first mani, and the Neon Nail Lacquer from Milani in the the colour Fresh Teal. What's modern about this mani is the teal colour and the fact that only the half-moon was kept silver. Once again, I free-handed my half-moon!


My only real issue with these shots is that the teal nail polish photographs much more blue that it actually is in real life. it's quite a strong turquoise green colour. Above was daylight, indoors, w/ flash. Below was taken in nighttime, w/ flash.

Direct sunlight, no flash.

Indirect sunlight, no flash.

Hope you enjoyed that quick Manicure post!! Till next time,
Mandy

Saturday 7 April 2012

FOTD - Plum Vixen

So for Day 5 of Nymphette's Face of the Day challenge, the theme was "Monochromatic". I had noooo idea what kind of look I was going to do, but it was a toss-up between black/grey and purples. I drew inspiration from my most recent nail polish buy - China Glaze's "Bogie". Of course, I bought the polish and literally came home and put it on immediately. I just LOVE it. It's from their Vintage VIxen collection from 2010. Bogie is a sexy taupey purple. I love it because under a flash or direct sunlight it looks very warm purple, like this.;


And then in natural or overcast light it can look almost grey, which is just gorgeous. It's a plumy, taupey grey.

So I drew my inspiration from that and went for a vampy, heavily dark smokey eye. I've been very enamored of the 1920s and 30s beauty looks lately, all the old screen sirens and the heavy, dark eyes and sultry looks. So That's what I did. 

I kept it quite dark all the way up to the brow, as was the trend in the 1920s. The modern touch was the dark corners, where back then the colour would be the same all the way through the eye. And the colour choice is more on the Modern side too!

For the Lips I created a subdued version of the 1920s pouty lip with a dark plum lipstick - the look is supposed to monochromatic, remember!

 The cheeks I kept a bit more subtle, with a rosy pink blush. For brows I just brushed through a little mascara - another modern element of this look. Brows back then would have been drawn on quite high, round and thin, or in the 30s more straight and extending quite far onto the temple.


It doesn't show up very well under the flash (I took these photos at night) but I extended the purple colour out onto the temple to create a longer, more sultry eye. This was common in a smokey eye in the 30s and 40s. however, to keep it more modernized, I went very easy on the bottom lashline instead of making it super smudgy and dark.


I really love how this look came out, I think I'm going to repeat it using teal and peacock blue-greens.

This blog post is late cause I'm suffering with the WORST case of Hay Fever I've ever had. I've had to skip day 6 and 7 of the FOTD Challenge because of the puffy itchy eyes and the sneezing and congestion. YUCK!! I'm sad too cause I was looking forward to the Mermaid and Alex Box looks. Maybe I'll d them at a later date anyway!

Products used:
MAC Pro Longwear Foundation - NC 40
E.L.F. Complete Coverage Concealer Palette - Medium
NYX Loose Powder - Cancun Tan
Avon Big Colour Eye Pencil - Eggplant
Coastal Scents 88 Ultra Shimmer Palette
MAC Eyeshadow - Beauty Marked
NYX Slide-On Eye Pencil - Jet Black
L'Oreal Collagen Volume Mascara - Blackest Black
CoverGirl COlorStay Eye Liner - Black
MAC MSF - Soft & Gentle
Maybelline FITme Blush- Deep Coral
Avon Luxury Lip Liner - Deep Plum
Black Opal Lipstick - Ebony Wine

Hope you liked this! I also filmed this as a tutorial, so keep an eye out for that!

Embrace your inner Vixen,
Mandy

Wednesday 4 April 2012

FOTD Challenge Day 4 - Color Block!

This is a trend that fascinates me. The idea is to separate the different parts of your face and pile the bright colour on without any thought to real blending. Well, that's a remedial idea of the trend. This trend from Summer last year also includes the "Ombre" (Gradient) eye and lip, as well as the coloured eyebrows and two-toned lips.

The reason I like this trend, even though I'm really not one to wear bright colours all over my face, is that it challenges the fashion rule of bold eye/neutral lip or bold lip/neutral eye, a rule which in my book is waaaay over-rated.

So for this FOTD challenge, I decided to do something bright and yet wearable. I went for the classic way to do this type of look: A bright shade on the upper lid, a different but equally bright shade on the bottom lid, bright cheeks and bright lips. I kept it wearable by using colours that are flattering on everyone.


 On the upper lid I used E.L.F Cream Liner in Teal Tease and on the bottom lid I used a single eyeshadow pan that I got as a sample years ago and there is no longer any name! :( but it's a shimmery amethyst shade. I used NYX Jumbo Eye pencil in milk to make it a bit lights and give it depth. For highlight I used my Victoria Secret Beauty Rush eyeshadow in Gold Rush. On the waterline I used Revlon ColorStay Eyeliner in Black. For a true Color Block look you could keep the colours from the lid through the waterline as well and use a bright blue on the upper waterline and then a plum on the lower waterline. :) For lashes I used my L'Oreal Extra-Volume Collagen Mascara in Blackest Black. I kinda like the chunky-lash look with this makeup!

On the lips I used Tropical Fuschia lipstick by Black Opal Cosmetics. It's a bright pink with a slight blue duo-chrome effect.

For cheeks I used La Femme Blush in Coral, a fine wash of E.L.F Bronzer in Sun Kissed and MAC MSF in Soft & Gentle as a highlight. I used a duo-fibre brush for everything. You could go for an even stronger cheek, but I was trying to keep this wearable! on the rest of my face: MAC Pro Longwear Foundation in NC 40 and NYX Loose Powder in Cancun Tan. I skipped the concealer on this one...was feeling lazy. :)

 I just opted for a quick messy ponytail and a pair of large hoops to complete the look because it made me think so much of summer and just coming off the beach!


Remember, you can substitute any colour and just go for it.. This is just an idea! Stay tuned for tomorrow's FOTD!!

Purple love, fuschia kisses and turquoise eyeshadow,
Mandy


Tuesday 3 April 2012

FOTD Challenge Day 3

It's day 3 of Nymphette's FOTD Challenge Calendar. Today's theme: Shop Your Stash!

Not only am I glad to be doing this daily challenge because it will force me out of my comfort zone a bit, but today's challenge specifically was sorely needed - I went through my entire makeup collection and actually cleaned it out while looking for products to use! YAY! You should see the amount of old stuff that I threw away!

So I discovered these awesome goodies in the depths of my collection:

Bourjois Paris eyes shadow in Noir Precieux

Loreal loose shimmering eye powder in Tart

ELF Mineral Eye Shadow in Innocent

Revlon Shimmy Eyeshadow in Toast (looks shimmery on the top but turned out very matte)

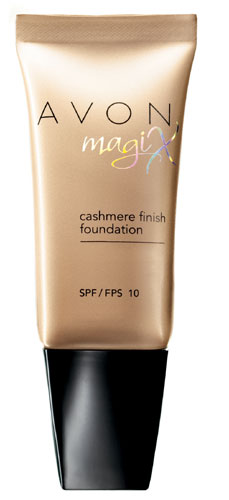
Avon Magix Cashmere Finish Liquid Foundation in Natural Beige

And this is the pretty result of me playing around with those yummy things:


I used a light layer of the Cashmere Foundation all over my face, the Noir Precieux, Tart and Innocent on my eyes, and the Toast for my eyebrows and to lightly contour.


Also Used:
MAC Paint Pot - Soft Ochre
ELF Complete Coverage Concealer Palette - Medium
Victoria's Secret Beauty Rush Radiant Blush - Fresh Love
MAC Fluidline - BlackTrack
NYX Loose Powder - Cancun Tan
MAC MSF - Soft & Gentle
Covergirl Lash Blast Fusion Mascara - Black
Avon Pro-To-Go Lipstick - Pink Passion
Transparent peachy lipgloss

BONUS: I filmed this as a tutorial, so stay tuned!!!

Wonder what I should call this look?

Now go discover what's hiding in the corners of your kit!!
Mandy