Tear Sheets

Monday 30 August 2010

Shoot Accomplished!

I am soooooo tired but we had such an AMAZING shoot yesterday! Cathy was an awesome model, and the whole team worked so well together! Our only difficulty was time constraints...but we made it work!

Here are some of the Dry-Run photos from our makeup experiments that happened really late Friday night...We were doing makeup practice from around 11pm Friday till 2am Saturday!

It's really important to do these practice sessions, especially for really involved shoots and really elaborate makeup, because there are so many steps involved and so so so many different ways to accomplish one effect that you should to learn your model's face and figure out what works best, what steps you can leave out, what products work best, and so on.

Check out my last blog for what the concept of the shoot was. For the makeup for this concept, I decided that I needed to accomplish a 'plastic skin' effect, to make her look like a mannequin. She also needed to look a little sad since she had been discarded, and I decided I wanted her to look very angular because it gives the feeling of being molded, like a mannequin would be. I decided that I would 'erase' her eyebrows too, because then I could draw her eyebrows on higher and it would give the impression of a 'pulled' look and tight skin.

So here are some of the pictures from our Dry-Run.

The first is the contouring. Cathy looks like a ghost!


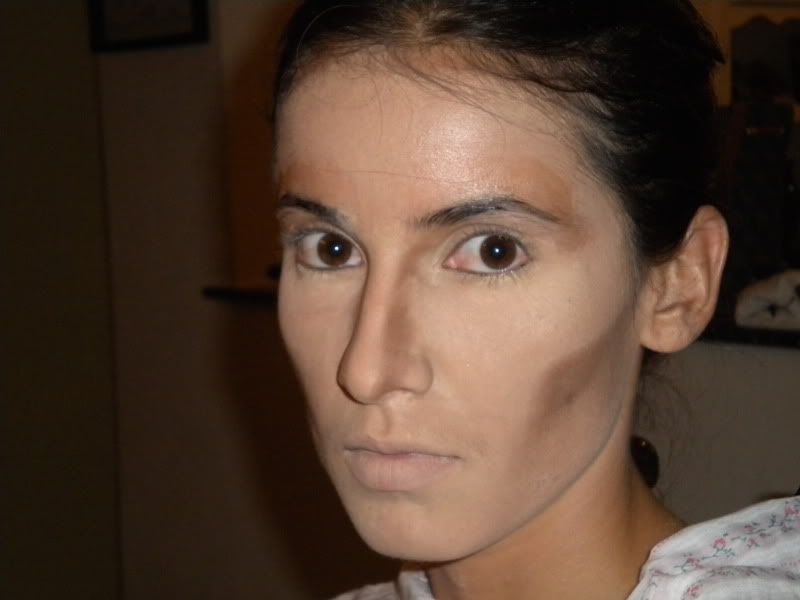
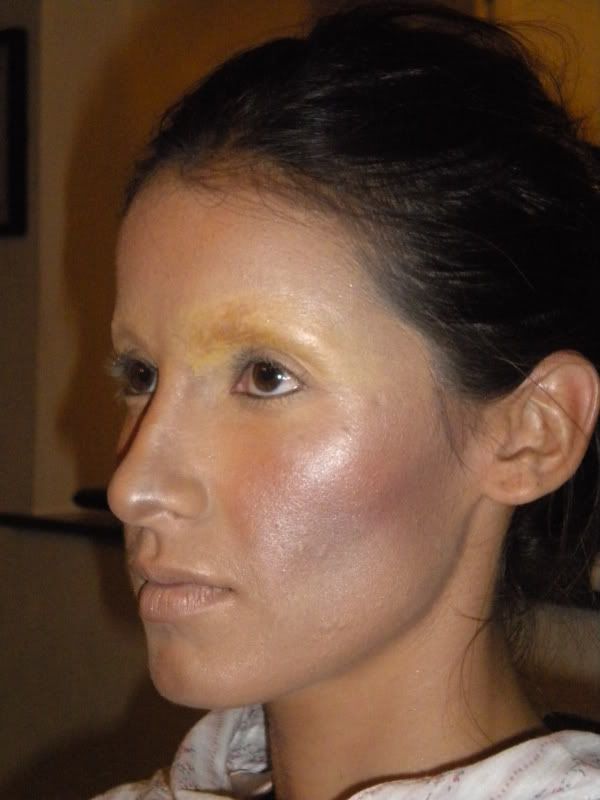
Now for the plastic skin and the covered eyebrows:


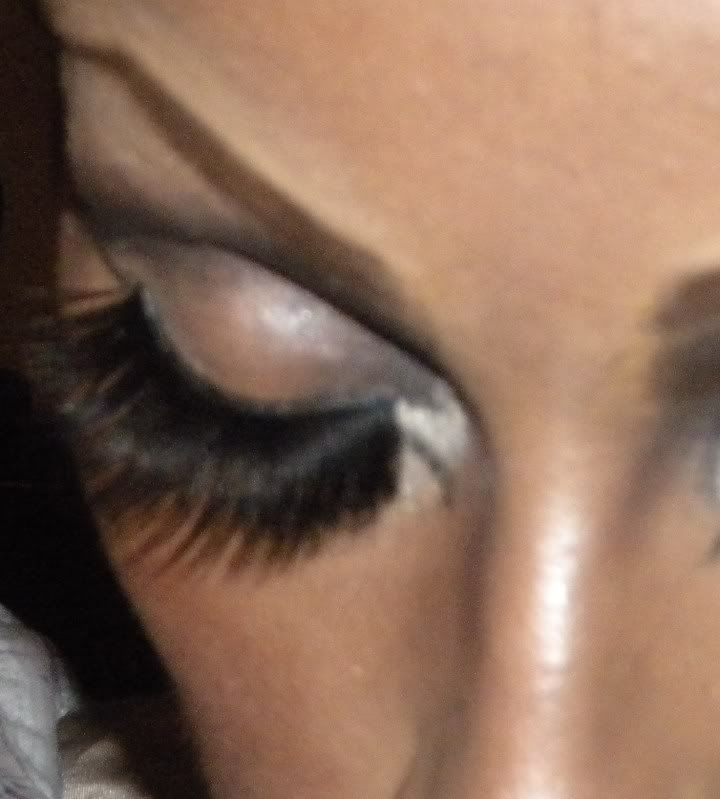
We didn't end up doing the bottom lashes like this because they made her too wide-eyed, but it was an idea. this is how you accomplish big wide-open doll-eyes.


A little brow bone definition. She does look kinda sad, especially with no eyebrows!


And we add eyebrows and lashes...


Finished! Of course I won't show you everything...you gotta wait till we get the shots from the actual photoshoot! But here's a side profile:


This makeup is actually a little more 'drag queen' than the final look on the day. Stay tuned for the final shots! They are incredible...Wait till you see how the costume and the hair and the makeup just all came together!

Until next time stay beautiful inside and out!

*I certify that all photos used in this post are my own*

Tuesday 24 August 2010

Gearing up for a photoshoot!

Hello beauties!!!

I am soo excited, me and my friend Alyson are getting ready to do a photoshoot this weekend. It's just for portfolio. Check out Aly's stuff, she's an awesome photographer (she took the photo of me I posted in my last blog too).

www.flickr.com/ALYshot


Hair is going to be done by Tara Thompson, hair stylist extraordinaire!

http://www.facebook.com/#!/pages/Mobile-Hair-By-Tara/105209839537936?ref=ts

Our model is my gorgeous friend Cathy.

Photobucket

Photobucket

The concept is Model as a Mannequin. So without giving too much away, the makeup needs to look modern but sad, and she also needs to look mannequin-like, i.e. plastic. I'm toying with the idea of Flapper makeup. I want to up-date it, but that's the idea,. Think Betty Boop!!

Photobucket

There's just something about the big eyes that I think looks a little pitiful. Flapper makeup is also the inspiration for modern Goth makup, which can also look pretty sad. Our girl needs to have a tragic beauty about her. So I'm going to update the classic flapper look from this:

Photobucket
Photobucket

To something along the line of this:

Photobucket

Can you see the difference? I'm going to soften the lines around the eyes a little, make it a tad more haute couture, and exaggerate the droopy eyes, which makes them look sadder. I can accentuate the droop by shading dark underneath the inner part of the brow. I also want a pencil thin 'painted on' brow, and so I need to erase Cathy's natural brows. I'm going to use this trick that I learned from Kandee Johnson and Blanche Babcock. Josh aka Misty Maven (Petrilude on YouTube) also has an eyebrow covering video that I like. Check out their eyebrow erasing tricks:

http://www.youtube.com/watch?v=Oc229_1TjpU


http://www.youtube.com/watch?v=nGdVDQ5cmAA


http://www.youtube.com/watch?v=vb3D-afzKEc

Those are my three most favourite makeup gurus on YouTube. They are all so inspirational in their own ways and I've learned so much just in the last few months from watching them. I think you can ALWAYS learn more, no matter how long you've been doing something. I've been a makeup artist since I was 18...that's TEN YEARS!!! But I'm always trying new things and learning new tricks!

We're doing a make-up dry-run on Friday and so I will post the raw shots from that along with the final look when the shoot's all finished. I'm excited!! (I think I said that already!! LOL)

Stay tuned, guys!

See you soon!

**Please note that I DO NOT own any of the photos I have used. The photos of Cathy are thanks to Jaryd Niles Photography. All the other the owners are unknown but thanks to them!**

Wednesday 18 August 2010

It's Just ME!!

I am sooo excited that I'm starting my new Make-Up blog....about something that I really really love and am really passionate about. I think all women should learn about make up and use it to enhance themselves. When you look good, you feel good! Stay tuned for all my make up tips and tricks and hints. Let's start off with my favourite: the "nude look" in ten easy steps. It just looks fresh and natural but polished. This is the best face to learn to do because you can add to it for an evening out, and it's really easy to touch up! I'm going to start filming tutorials for youtube, too, so stay tuned for those!

Photobucket

(1) Apply foundation. Make sure it matches your skin and that it's blended well. It doesn't matter if it's light, medium or full coverage, choose whatever makes you feel comfortable.

(2) Apply concealer a shade lighter than your foundation to the entire area under your eyes, and around your nose, and anywhere else you think you need some extra coverage.

(3) Set your foundation and concealer with powder. Remember,if you're using a puff, PRESS the powder into your skin, never rub. if you're using a powder brush, use DOWNWARD strokes, never UPWARD. The only place you don't sweep DOWN is under your eyes...sweep across from the nose-bridge to the temple.

(4) Contour if you want, brush some darker powder or a matte bronze with an angled blush brush along your temples, the sides of your forehead, the sides of your nose and under the cheekbones (corner of the mouth to the top of the ear). This makes you look defined and tanned. Just don't go too dark or you'll look weird!

(5) Use a pale, neutral shimmery or matte eye shadow all over your lid, from the lashline right up to the brow. if you're caucasian, you could use a pale yellowy or beige colour, if you're hispanic or indian, a bronze or taupe colour, and if you're of African descent, a copper or chocolatey brown. Basically use a colour that matches your natural flesh tone.

(6) Define your brows. Some people do this with brow gel that looks like clear mascara, you could also use a brow powder and a tiny stiff angled brush to darken your eyebrows. You could also use both, darkening the brows and then taming stray hairs with the brow styling gel. Eyebrows are VERY important because they shape and frame your face and make your eyes stand out. When you have nicely groomed and defined brows, you just look really well put together. Pay attention to how to shape your brows! I will post a blog on grooming the brows and findign the right shape soon.

(7) Curl your lashes, and apply your favourite mascara. Optional: before the mascara, apply a thin line of liquid liner to your top lashline. Do this if you want just a little more defintion. If not skip it!

(8) Line your water line with a black or dark brown khol eyeliner if you want to define the shape of your eyes. Or you could line your lower water line with white eye pencil to look bright eyed and awake.

(9) Apply your favourite blush lightly to the cheeks. If you want to you can also apply a highlighter to the tops of the cheekbones and down the center of the nose. This just gives an added bit of subtle drama to the face by bringing out the features and contouring it a little more by adding some depth.

(10) Apply lipbalm, lipgloss, or lipstick. use a lipliner if you want to, but for this look it's not necessary. It's Your choice!

You're done! Ten easy steps and now you look incredible and polished and ready for anything!

Much love and sparkles and beauty! See you next time!