Tear Sheets

Monday 11 November 2013

Why different colours for different seasons??

This is something that those of us in the tropics don't really understand, since we have pretty much what most would consider year-round summer. I get people asking me all the time "so why  is it that suddenly in Fall we break out the wines and plums and deep bronzes??" I'm going to re-use my season-inspired makeup looks on the lovely Malissa Alanna to demonstrate my explanations, as well as some pictures of each season that I borrowed from the internet.

People don't realize that even in the Tropics, the weather changes (very slightly but it's still there if you know what to look for). In other parts of the world of course it's very obvious.

Here's the reason for the different colour palettes for the seasons:

It has everything to do with light. The seasons all have different kinds of light, partly because of the weather, and partly because of the different colour-groups that appear in nature in the different seasons. So, let's break it down!

SPRING


Spring light is very clean and pure and soft even though it's bright, and the colors in nature are lots of pastels and pretty, vivid, yet pale colours. The pink and yellow flowers are beginning to bloom, blue and pale orange butterflies are flitting around, and animals are growing in their lighter coats and feathers and so tend to look really "new" and clean. Chicks and lambs are soft, gentle yellows and greys. The weather tends to get a bit rainy, but even when the sun is shining, there is something about the light that is bright but soft. 


Spring makeup should be dewy, with soft edges and gentle highlight. The muted light makes pastels really pop, because they aren't competeing with harsh light for attention. Harsher, more neon colours will just make you look like you put your entire makeup collection on your face at once with a paint brush.

SUMMER


Summer is of course full-on, harsh sunlight. Any flowers that bloom in summer are bright orange and red and purple. The sea tends to look brilliantly blue, fruit is brightly coloured and juicy. Take your cues from nature: flowers have to be really vibrant because they need to be seen by birds and bees in order to spread pollen. Most animals are also at the height of their mating seasons at the beginning of summer, and so their coats and feathers are rich, bright colours to attract mates. 


In Summer we can get away with wearing full on neon colours and bright gold. Keep the skin bronzed and highlighted so that your features don't get lost in the harsh light. The reason we need really vivid, bright colours in Summer is because, quite simply, pale, soft colours just won't show up in competition with the sharp, bright sunlight! Just be careful not to wear too any bright, clashing colours. To avoid looking clownish in bright colours, stick to one or two features and keep the rest a sexy, bronzed neutral. 

FALL


Fall (or Autumn) is the most muted, diffused light of all. Suddenly everything in nature turns dark, deep, rich colours as the leaves die and the animals shed their fur and feathers to grow in their darker, thicker winter coats. Vegetables and grains signal that they're ready for harvest by turning richer, deeper shades of colour. 


The muted, golden sunlight is super flattering, making makeup colours like deep plum, burnt orange, rich burgundy, deep red, burnished gold, bronze, dark forest green and richchocolate brown show up beautfully. Use highlight and contour to add dimension but make sure it's blending well. Try a really strong warm cheek, regardless of your natural undertone! You can go soft or dramatic, but stick to this palette to take full advantage of the naturally diffused, warm light of Autumn.

WINTER


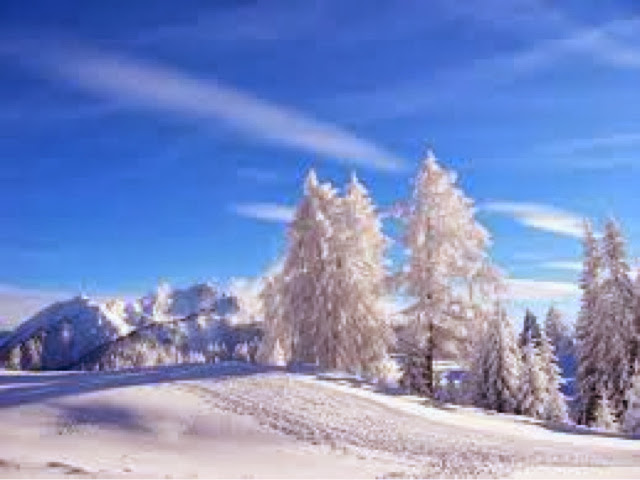
Winter actually has pretty harsh light, especially noticeable in colder climates. It bounces off the white snow, and because the trees are bare and animals are either hibernating or wearing dark coats (because dark colours attract light and heat which they need in the cold to survive), the light appears stark and bright because there's nothing to diffuse it. Even when it's overcast, again because there aren't any other colours to warm the light up, it's generally a cool, bright, even white light. 


For makeup, break out the drama and wear nature's colours: grey, black, dark blue, dark purple, silver, and, of course, white. Keep the skin to a satin finish because though skin does get dry in winter and you want it to look heathly, the light is quite harsh and will bounce off the highpoints of your face anyway. Subtle contour and highlight is the way to go. Wear brighter colours like Cherry Red and Royal Blue in small pops of colour on the face. Too much will look a little too heavy and harsh, but in small pops they can be really beautiful.


Bottom line: matching your makup to the palettes you find in nature is the best way to make sure it's flattering in the natural light of the season!

I hope that cleared it all up for you!

Sunday 10 November 2013

Real Techniques Brushes - In-Depth Review

I got my first Real Techniques brushes about a year ago. The first ones I got were the Core Collection and the Starter Set, so I'll talk about them first. But I'll start by saying that Samantha Chapman has absolutely hit the nail on the head with these brushes. I would really just like to thank her personally for designing these the way she has.

All the brushes are really densely packed with very soft synthetic bristles, and they're cruelty-free. They apply makeup evenly and you can vary pressure for lighter or heavier application of colour. From the moment I began using the brushes I was really impressed. They are really well made, with extended light weight aluminum ferrules, and a non slip rubber end makes up the rest of handle. I was worried that the brushes would be a bit too light and therefore fiddley, but they're very well weighted even though they are light and the non slip part sits right in the crook between your thumb and forefinger and makes the brush feel really secure in your hand. The first job I used them on was a four-day music video shoot, and they stood up so well to the abuse of being cleaned several times a day! Even my oldest Real techniques brushes have never shed a single hair, and I wash them all the time (becauseI'm  freaky about having absolutely clean brushes, even my personal ones). They are also really easy to spot clean.

I think one of the things I love most about all these brushes is that they are so versatile and can be used in such a variety of ways and with all kinds of products. They're durable too. These first two sets were almost literally the only ones I used for about six months straight and they're still in near perfect condition. The brushes are colour coded: gold for base and powder brushes, pink for face and setting brushes, and purple for eye and detail brushes. But honestly, any brush can be used on any part of the face with either liquid, cream or powder products. I use these brushes both on myself as well as clients. 

All the sets come with the specially designed carrying case, called a 2-in-1 Panoramic Case and Stand, which has elastic brush holders on both side. The case itself is quite sturdy and keeps the brushes safe. It can also bend in half width-wise, and has a little pulley system that makes it into a brush stand, perfect for traveling and doing makeup in right spaces. Because I've now bought quite a few sets I've given away the extra cases to friends and kept two for myself. The only downside of the case is that it's the perfect length for the Real Techniques brushes but some other brands of brushes are a little too long. It's not really a big deal as long as you don't mind the handles of the brushes sticking out a bit when the case is closed for traveling. I've given mine quite a beating for a year and they're still in great condition. They're also really easy to clean. I just wipe mine down with a makeup remover wipe or a cotton pad soaked in makeup remover.

*DISCLAIMER: all images borrowed from the Real Techniques website - www.realtechniques.com*

The Core Collection (above) comes with four brushes: (from left to right) Contour Brush, Pointed Foundation Brush, Detailer Brush, and Buffing Brush. 

The Contour Brush is an excellent brush for contouring, of course, but I also use it sometimes for setting the under eye area and also for precisely applying blush and highlight. Because these brushes are all synthetic they work great with either powder or cream/liquid products, as I've said, and this brush applies cream bronzers and blushes beautifully. It's very dense but the tip is soft and tapered a bit so it blends out edges really nicely when you use light pressure and circular motions. It's also great for quickly sweeping a neutral shadow across the whole eyelid up to the brow if you're doing a simple, natural look. 

The Pointed Foundation brush I find a bit small for applying foundation all over the face, but it's great for concealer, especially if you use a lighter concealer for highlighting across the cheeks and forehead. Because it's pointed it can get right into tight spaces like the inner corner of the eye and around the nose, and it just makes concealer application quite fast. I also use it for placing cream contour. I don't blend with this brush though, because it's too flat for blending. 

The Detailer Brush is shaped like a regular lip brush, and can of course be used for lipstick. It's nicely tapered to a point, so it's also great for cleaning up the outer lip line (after applying liner) with concealer, for concealing small areas and also for applying cream shadow to the mobile lid or inner corner.

The Buffing Brush, in my opinion, is the shining star of this set. Use it for moisturizer, primer, liquid or cream or powder foundation, liquid or cream or powder highlight and contour, and even for buffing in setting powder after it's been applied with a puff or a fluffier brush. I also use it in pressing motions to really sink the product into the skin. It can also be used with a stippling motion. It's an excellent brush that I cannot imagine not having in my kit or personal collection. It's soft but still firm, applies pretty much everything evenly and blends the edges beautifully. It can be a bit difficult to clean, because it's so dense that if you're using a shampoo or other liquid soap the foam can go up into the brush and then you're washing out bubbles forever. I combat this by applying the soap to the ends and working it while the brush is still dry to minimize foam, and then when it hits water cease working the soap altogether and just rinse well. The slight inconvenience of getting it rinsed well is so worth it for me because this brush is one of my favourites both of the Real Techniques line and in general. 


The Starter Set has five brushes in it: Deluxe Crease Brush, Base Shadow Brush, Accent Brush, Pixel Point Eyeliner Brush, and Brow Brush. 

The Deluxe Crease Brush is another favourite of mine. It's basically a mini round kabuki brush, dense yet soft, about the size of the tip of an average ring finger. Use it for blending concealer or cream base over the eyelids, or for packing eyeshadow on the lid or in the crease. I have used it for blending powder shadow in the crease but it works best for me with cream products. Same note applies for cleaning this brush as for the Buffing brush. 

The Base Shadow brush is a fluffier brush, but it's tapered and set in a flattened ferrule so it can also be used for placing colour. It's a little less dense than the others, so it's perfect for blending shadows on the lid or in the crease, and also for a softer application on the lower lid with the pointed tip. It can also be used for blending or smoothing very creamy bases on the lid, but not really for buffing them in. I just reach for this brush all the time because it's also very easy to spot clean and dries quite quickly. 

The Accent brush is a great, fairly stiff, tiny, flattened brush with a rounded edge. I've used it to apply a thick liner, again either cream or powder, and then buff it out for a smoky line on both the upper and lower lids. It's also great for placing shadow in the outer 'V', as well as highlight in the inner corner, pretty much any precise work. I've also used it for softly filling in brows for that devil-may-care thick brow look that's very popular these days, and I use it to apply gel liner to both my waterline and tight line. 

The pixel point liner brush isn't good for uber thin eye liner but it does apply a beautifully clean, thick line without too much need for filling in. It's also great for pin point concealing, lining the lower lashline, and for smoothing out lip liner. 

The brow brush is a bit big for fine brow work, but if you have or want thicker brows it's great, especially when used to set any pencil or gel/wax brow product with powder. I also use it if I want a precise nose contour or to help me define the crease for cut crease looks, and for applying shadow to the lower lash line. It can also be used to clean up the lip line. 

After having these brushes for about six months I got another of each set. And then recently I bought yet another of each and also some other single brushes: a Powder Brush, a Setting Brush, a Blush Brush, an Expert Face Brush and a Fine Liner Brush. 


The picture of the Powder brush is deceptive. This brush is HUGE and a bit more flared out than it looks. It is dense and thick but so very soft. It's an amazing powder brush, and because it's dense it stands up to pressing powder into the face so as not to disturb any cream products in the face, as well as to buffing the powder in. It's so big and soft that it can also be used for just smoothing everything together and blending everything in at the very end. 


The Setting Brush is a larger version of the Base Shadow Brush, also tapered a bit, but a rounder. It's more loosely packed than the Contour and Powder brush, and is perfect for setting the under eye and t-zone area with a fine layer of powder. It can be used for all the applications as the Contour brush, but because it's looser it applies product much more lightly which is great if you  have a tendency to overdo it or if you want to build up product in light layers. This is another brush that I must always have on hand. After getting one and using it just once I immediately bought another one. 


The blush brush is also a bit bigger than you'd expect from the photo. It's tapered and again, a bit more loose than the Contour or Powder brushes. But when I say they're loose, I don't mean that they're flimsy at all. All the Real Techniques brushes stand up to what I call the "press-test", where you put them on their heads against your finger or the palm of your hand and try to press the bristles down toward the ferrule. They don't collapse even when you apply a fair amount of pressure. The blush brush is great for applying blush and achieving that diffused glow to the cheek. If you use the tip to place the blush gently and then press to splat the brush out more and work the product, it helps blend flawlessly. It can also be used for setting powder, powder contour and highlight. The only thing I'll say about this brush, and the Setting brush, is that I wouldn't use them with cream products just because they are more loosely packed so they don't stand up really well to creams. That, however is a personal thing because of course, once again, they're synthetic, so by all means it you want to use them for creams you absolutely can


The Expert Face Brush is a rounded buffing brush with short, tightly packed bristles. It's probably the most tightly packed of all the ones I have. It's smaller than the Buffing brush, and it has an oval shaped ferrule. Like the Buffing brush, it's excellent for applying cream and liquid moisturizers, primers, bronzers, contour and foundations. It works the product into the skin beautifully. I wouldn't, however, use it for powders because of its shape, but once again that's a personal preference. But it's definitely a great base brush. 


And finally, the Fine Liner brush is a must have simply because it is so fine and yet dense. It keeps its shape really well and allows you to apply the most crisp fine or thick line, and can also make the perfect winged liner. It also allows you to get right into your corners to elongate the eyes or point the inner corners of the eye. 


If you've read this far thank you for enduring my exhaustive rave about the Real Techniques Brushes that I've used and have in my collection! These brushes would be worth every penny if they were expensive, but the beautiful thing is that they are super affordable. Having bought so many brushes from different places at different times I can honestly say that the quality is great and very consistent. I recommend these brushes for anyone, whether you're just starting out or you're a pro. If you are a pro you'll still need all your other brushes, but these are a fantastic addition to your collection, and for those non-pros these brushes just might be all you need! The fact that there isn't a huge selection of different shapes put me off at first, but each brush is such a brilliant multitasker that there really isn't much need for that many more shapes. I would like to see a brush loosely packed like the Setting and Blush brushes but halfway between their sizes. I'd also like a fluffy blending brush. I know there's one in the duo-fibre collection but those are the only brushes I request for the original permanent line! 

Kudos to Sam Chapman again. These truly are incredible brushes!


Saturday 9 November 2013

What I've been up to...

Hello lovelies!
I've been super busy! I'm working on a new blog post for you guys on makeup and humidity (an evil, evil combination!) and tips for handling it. I'm also working on a post about my recent hair colouring adventures, but for now here are a few shots of some makeup I've done recently. 

If you subscribe to me on YouTube, you might remember that I said I was going to be the model for a photoshoot. The photographer was Andre Williams. He was great fun to work with. I met him while working on another photoshoot with the gorgeous sixteen year old up and coming singer Neira. 


Here are a few of the shots he took of me. 


I had great fun doing this shoot. We drove all over the island to various spots. And yes, that snake and the iguana are absolutely real! They were both great, very lively and fun to pose with. I think some of my favourites are the ones with the dog. She is a two year old English mastiff and was just the coolest dog over. They just look so badass! The cameo I'm wearing in most of the shots was made by Avi. Her brand is The Cemetery Party, and she hand-makes all of her pieces. I absolutely love it and literally wear it almost every day. Find her on Instagram @TheCemeteryGirl so you can see her incredible pieces. She takes international orders too!

I also worked with Andre on one other photo shoot. This time our subject was the lovely Jenny Wilkie. I was excited to so this because I don't often get the chance to do makeup on women over 40. And Jenny is beautiful to begin with, and an absolute sweetheart. 


Other than that I've added a new tab to this blog called Tearsheets, where you can go to see images of the work I've had printed in M People magazine. Remember you can also visit the Portfolio tab to see high res images of my work if you want to. I've also done the makeup for the cover of M People for their December issue so I'll share that when it's released!

I also did this for Halloween. Ben asked me if I could transform him into cancer suffering Walter White from the kickass show Breaking Bad. Seriously, if you haven't watched it, you must. This was a great challenge because again, I don't get to do stuff like this very often in Barbados. I built up the cheeks for the deep smile-lines/wrinkles with Ben Nye Nose and Scar Wax. All the other wrinkles I created with makeup. I had to create the goatee from a crappy old Amish-style elasticized beard he had from another year because we couldn't get a proper facial hairpiece here. I had to cut it and stick it on with spirit gum. We also had some bald cap issues because Ben has a pretty large head (love you, Ben! LOL) and so the cap was a bit small and didn't come down over the ears properly. But with the costume, glasses and fake gas mask the bits that wouldn't stick down were hardly visible. This makeup would never have stood up to close up photography or film but at the party it was awesome, and he reported that he was the talk of the night!


I'll leave it at that for now. I've been a busy monkey! I'm so grateful every day to be able to do this for a living! Thank you guys so much for following my blog. Join me on twitter and Instagram @LadyMandyisms, Facebook at www.facebook.com/aboutfacebygossamertouch and YouTube at www.youtube.com/user/mandyaboutface 

Till next time!
Mandy <3 

Friday 4 October 2013

Queens

Hallo Beauties!!

I have been absolutely DYING to share these photos with you, and now that the September issue of M People is out, I finally can!!

I've had the pleasure of working with Bajan singer Malissa Alanna for a while as her makeup artist. Earlier this year, we started talking about doing a beauty photo shoot for fun. I got Alyson on board as the photographer, and then I set to work with the concept.

Malissa has a wonderful face for makeup, and can look completely different depending on the colour palette and style of makeup, and I wanted to make the most of that. I've always wanted to interpret the Elements artistically with makeup, and while toying with that idea I decided to transform Missy into five different Queens: Air, Fire, Water, Earth and the Void.

Drawing on esoteric concepts (since I'm quite airy-fairy), I used the seasons (which, in Neo-Paganism, correspond to the four elements) as the inspiration for the colour palette, style of makeup and the crowns.

I also gave each Queen a name, in order for us to be able to connect to each one and get to know her. In directing the shoot, I gave Malissa a mood-word for each Queen to help her get into character, and to help Alyson know how to light and shoot each look. I also loved the idea of doing this with one model because each aspect portrayed by the Queens is found in every woman.

And here are the final shots!


Nieve - Air Queen of Spring. Her mood-word was Rebirth. I mainly used my Coastal Scents 88 Color Palette over NYX Jumbo Eye Pencil in Milk. I also gave her a purple wash over the cheekbones instead of a highlight, to give the impression of newness and the flush of blood through the face, and for the same reason on the lips I used a pink lipstick as a stain just at the centre of her mouth for a fresh flush. Lashes are from Ardell. I made the crown from craft store Raffia, butterflies and feathers. The colour palette was the fresh, soft yellows, greens, blues and pinks of Spring.


Aine - Fire Queen of Summer. Her mood-word was Passion. I used Flamepoint, Love+ and Buttercupcke from my Sugarpill Burning Hearts Palette to create the sunbursts. Did you notice that the starburst on one eye is the negative/positive opposite of the other? Fun! I used a much darker foundation on the face, neck and chest to tan Malissa up, leaving her natural skin tone only in the centre of the sunbursts. For lips I mixed Sugarpill Goldilux with a little clear gloss, took Goldilux through the brows a well, and sprinkled rhinestones over her shoulder. I placed each rhinestone by hand...it was painstaking! Lashes are from Ardell. Her crown was made by wrapping the stems of spiky fake flowers in a cluster on an orange bandeau. The colour palette encompassed all the warm, passionate gold, red, bronze, brass and copper of Summer.


Maeve - Water Queen of Autumn. Her mood-word was Dream. I used Sugarpill Poison Plum, MAC Carbon and soft matte browns from the CS 88 Palette for the eyes. I wanted to create a look that was inspired by a skull, since Autumn is the time when death creeps over the land, and so I kept the eye shape dep and round. I used Goldilux on the lashes, around the perimeter of the face and down the neck to give her an otherworldy look. The lipstick was a deep wine colour from Avon called Cherry Jubilee. Her crown was made by braiding very long synthetic hair with copper and gold ribbons and little copper twigs from a plastic wreath.


Elysia - Earth Queen of Winter. Her mood-word was Silence. I gave Malissa's naturally Bisque skin a pinker tone by applying a cool toned highlight all over the face, neck, shoulders and chest. I covered her eyebrows using glue, and used MAC Carbon and Sugarpill Lumi on the eye and to create the new brows. MAC fluidline in Blacktrack was used for her dramatic, graphic winged liner. I used a bright pink blush very sheerly on her cheek and Lumi as an all over highlight. the black lips were a mix of black pencil liner and clear gloss. The crown was made by dyeing and heavily starching black a piece of very old white crocheted lace which I then attached to a plain black bandeau using wire to support it.


Alma - Queen of the Void, represents everything and nothing. Her mood-word was Spirit. She is difficult to interpret: how do you protray literal nothingness? I went for pure white everything to challenge myself to be able to make depth in a monochromatic setting. I covered up the eyebrows, and used Mehron white face paint mixed with a hint of Missy's own porcelain-toned foundation (so she wouldn't look like a sheet of paper) all over her face, ncek and shoulders. I dusted Poison Plum very lightly in the outer corner and along the lower lashline to define the eyes. I kept her contours slightly lavender-tinted instead of flat grey to boost all the white without cooling it down or warming it up too much. The lips were filled in with the foundation mixture, a nd lined with pale purple only on the outer lipline which I then blended inward for a very subtle ombre effect. Crown is actually just a string of crystals pinned into the hair.

I decided to stick to close-up Beauty shots because we financed this ourselves and couldn't afford to make costumes, and so instead I hand-made special crowns for each Queen. Nieve wore butterflies, grass, and flowers, Aine wore spiky orange flowers, Maeve wore a golden braid with copper ribbons, Elysia wore black lace, and Alma wore a circlet of crystals.

We shot all five looks on the same day, and everything that could go wrong, did! We were without electricity for over 4 hours, and had to re-work our entire shooting schedule. We ended up shooting until well after midnight, because some each look, especially Elysia and Aine, took nearly two hours to create and then almost an hour to set up and shoot. But we all got along so well that we turned it into a girls' day, and we had a lot of fun working together. Malissa and Aly were such awesome sports and did such an incredible job of bringing my vision for this to life. We are all thrilled with the results, and I'm super excited that M People has decided to run the finished shots!

More exciting stuff to come so stay tuned!!

Wednesday 18 September 2013

Secrets

Hi lovelies!!

I haven't blogged in a while, so I thought I'd share with you guys a project I worked on last year: A music video for a young singer and her Band: Jenn & 166.

Jenn and her family are personal friends. I refer to her mum, Sandra, and her dad, Ian, as my adopted parents, and Jenn and her older sister Paige as my little sisters. When Jenn asked me to do her makeup for her music video, I didn't hesitate.

The song is called "Secrets", and the story of the video is that of Jenn being forced to work with a boy that no one likes at school, and finding that she actually hits it off with him because all he really needed was for someone to encourage him and talk to him.

My challenge was to make Jenn up in her punky style but still let her youth shine through since she was only 17! I also helped her style her wardrobe for the video. The young man that played the Boy in the video is the son of a friend of mine, and he also did a fantastic job. He had never done anything like it before, and he impressed everyone on set with his professionalism and willingness to do whatever we wanted. I styled his wardrobe and helped even out his 17-year-old-acne-prone skin for filming. FYI: Ian (who is also Jenn's Manager) plays the school teacher, and Paige is also in the video as one of the students. See if you can spot her! Sandra refused to be in the video, but she played her usual mother hen self in the background, taking care of everyone.

Most of the lighting was natural except for the 'concert' type shots.

To preserve Jenn's youth for the video, I made sure her skin was healthy and glowing for pretty much every shot, regardless of how much foundation or concealer I had to use. She has pretty good skin, so there wasn't a whole lot of cover-up necessary, and any foundation I used I kept quite sheer and dewy, which meant lots of touch ups because it was SO HOT while we were filming and poor Jenn was just sweating like a pot cover at some points! I didn't mind though, that's all part of the job.

In the first scene (the school scene) I left Jenn's skin almost bare, highlighted her and gave her a gentle rosy flush on the cheeks and lips, and placed a pop of teal and purple liner on her eyes. For the Beach scene we did something similar, except that the pop of colour was a salmon shadow in the outer crease, which I then amped up a bit by added purple shadows and black liner for her solo beach shots and the main performance shots (the one where she's wearing jeans). We also added some rhinestones because Jenn loves them. I only had about 10 minutes to dial the beach look up because the most incredible sunset was just starting, and we knew it would only last about 15 minutes. That was nerve-wracking!

The most involved look is the night-time club performance. Jenn wanted something more dramatic, and my challenge was to make it dramatic but fun. I was adamant that I wanted to make sure she still looked like a teenager! I went with extreme black glitter winged liner and I added some MAC 3D Silver to brighten it, and I stuck to bright pink lips. I added a few black stars for their funky youthfulness. 

And while touching her up between shots the director was struck with inspiration for a piece of storyline, and pulled me into the video. You'll see it! I had taken the time, though I was exhausted after a long day of filming, to do my own face, and I'm eternally grateful I did!!!

Click this link to watch the video (My iPad won't let me embed the video *booo*). Please share it and support Jenn & 166!

I want to add that it's really beautiful to see how Jenn's family came together to help her make this dream of being a professional singer start to come true. Their unconditional love for one another and the way they support and look out for each other is truly inspiring! The Music Video was produced by Cherokee Black Records.

Thursday 27 June 2013

My Life with Keratoconus

I was diagnosed with this disease three years ago, even though my symptoms began when I was 17. I had a "ghosting" effect in my right eye, which my Optician told me was due to my astigmatism.

I thought nothing of it, got used to it to the point that I would only really notice the ghosting if I was looking for it, and carried on with my life. Fast forward to the age of around 24, when I began to have difficulties getting my soft contacts to correct my vision. I had always had near-perfect vision with my contacts. My Optician tried to help, changing my prescription almost every month, and trying different brands and different types of soft lenses, including torric lenses (which are soft, but a little larger than regular soft lenses).

Once more, I got used to just not being able to see perfectly, and it wasn't too bad. I carried on with my life.

When I was 27, I went for an eye appointment and my regular Optician, Mr Melville, who I had been seeing since I was 7 and first got glasses and was old even back then, was out sick. Mr Edward Haslett was filling-in. He was very nice, gentle, and attentive. 

I told Edward all about my vision woes. I was in that day because I couldn't even see to watch TV with my current lenses. suddenly My eyes were so sensitive to light that I couldn't step outside without wearing my sunglasses. I was having trouble seeing at night because for some reason headlights were streaking so badly and if I was tired, every light had a huge halo around it.

Edward sat with me for nearly two hours trying to get an Rx that would work. And then he said to me: "I don't want to worry you, but I think it's possible that you may have Keratoconus."

Kerra-ta-wha?? He gave me a pamphlet and told me to look it up, and to come see him in 6 months when he would check my lenses again. He told me that he could not definitively diagnose me until we went through a few months of trying certain lenses out and running some diagnostic tests.

Being the research maniac that I am, I found out that Keratoconus is a disorder of the eye in which the cornea become unstable, thinning-out in the center, and losing its shape. The cornea becomes cone-shaped (Kerato (greek) - horn or cornea, and konos - cone). It can happen in one eye alone but is much more commonly found in both of a patient's eyes. It causes a deterioration in vision, light-sensitivity, streaking, multiple vision and ghosting, halos...all the symptoms I had. I learned that regular soft contacts and glasses could not correct vision in Keratoconic eyes. I also learned that Keratoconus is compounded by my other vision issues: regular astigmatism and myopia (short-sightedness), because in addition to correcting the way light is coming into the eyes through the cone-shaped cornea, we would also have to correct my myopia.

Then I got pregnant, and financial constraints wouldn't allow me to get the test that Edward recommended: a Corneal Topography, which is a 3D image taken of the cornea to determine its shape. We just stuck with a type of Torric lens that helped more than all the others had for the time being. 

After my daughter was born, I finally had the Topography done, after a bunch of tests with different lights and dyes. Edward took one look at the Topography images and said "exactly as I suspected, you have Keratoconus in both eyes." I was 28. 

Even though I had figured that I must have it, after reading the literature and doing the symptoms checklist, hearing the words still made my heart fall through my stomach, because I knew the end point of Keratoconus can be very severe, leading in some cases to corneal transplants, cornea rupturing, and, in rare cases, blindness. It's degenerative, and there is no cure. 

But Edward was so nice to me, so patient, he calmed me down and said "let's deal with this. It's manageable. Your case isn't too severe." That's not to say that it might not progress rapidly, but for now, we manage it.

We started  a few months later with fitting me for Rigid Gas Permeable lenses. We went through a few different types until we settled on one that had a slightly large diameter than normal, since I could always see the rim of the smaller ones in my field of vision. For a year I battled with my RGPS. They corrected my sight, but they collected lots of dust and corneal and skin cels, which irritated my eyes and made the contacts blurry. 

I live in Barbados, where corrective options are very limited, and treatments like surgeries are non-existent. Edward wanted me to try hybrid lenses, but to do that I'd have to travel to Miami, be re-daignosed, and then fitted. The lenses themselves are quite expensive, and I simply could not afford the trip and the cost. As it was, the RGPS I was using I had already paid $900 for, in addition to all the tests and appointments. 

And so Edward suggested "piggy-backing", where I would wear a soft "bandage lens" underneath the RGPs. It's not  permanent solution, but it would help for now. I have such bad ghosting (my worse symptom) that glasses are a waste of time other than getting me around my house. I don't wear them for any other reason than to give my eyes a break from my lenses.

That was 2 years ago. So far I've managed pretty well. But now I've got another curve-ball to face.

I just had a check-up, and while the correction of my lenses is still almost perfect 20/20 vision, the fit of the lenses isn't great. They are pressing slightly on the high point of each cornea, which is why I sometimes get eye pain if I'm really tired or my eyes are dry, or if I have to wear my lenses for prolonged periods several days in a row.

Edward wants me to go overseas to be fitted for hybrids as soon as possible. The current economic times just won't allow it. I do have to get another Topography done, which we can do here, to determine if there's progression in my Keratoconus, and if there is, how much. For now I'll probably have to get re-fitted for a new set of RGPs that have a deeper well so that they're not touching my corneas and putting pressure on them. Pressure on the cornea is one of the biggest no-no's with KC. No rubbing of the eyes at all (which is a huge Catch-22 because you eyes are more sensitive to light and dust etc, which makes them itchy). 

My case isn't that bad yet. I pray it won't get too much worse. In Barbados there are no options other than RGPs. we don't do cornea transplants for KC here, hybrid and scleral lenses aren't available here, and we certainly don't have cross-linking or Intacs done here.

There are amazing support groups online on all the social media sites. It is very scary. I felt like my eyes were these huge ticking time bombs that were going to explode suddenly in me head and leave me blind. I still feel that way sometimes.

But I didn't let it stop me. I figure if the worst case scenario is going blind, then I should enjoy my sight while I have it. My case is moderate at the moment, but I can't rely on that because there's no way to predict how it will progress. 

I've done lots of experimenting to find ways to wear makeup and still care for my eyes. I've figured out how to remove my makeup without disturbing my corneas. I made a video on KC and also on applying makeup with KC. I'm going to film how I insert my contacts and how I remove them, and also how I clean my makeup off.

We keep going. Carry on with life. It's a serious problem, but it doesn't define you. Those of us who are managing our KC can be a beacon of support for those who have just been diagnosed and those with bad cases. And we can raise awareness about KC to have more research done and more and more treatment options available. 

If anyone reading this has KC or knows someone who has it, please share your stories with me! Check out my videos on KC on my youtube channel and share them with your friends and family: www.youtube.com/user/mandyaboutface

For more information visit:
www.nkcf.org
www.keratoconus.com

Search hashtag #kcfamily and #keratoconus on Twitter and Instagram.
Search for Keratoconus on Facebook - there are tons of groups and support systems.

Follow me on Twitter and Instagram @LadyMandyisms
Like my Facebook Page www.facebook.com/aboutfacebygossamertouch

Let's support each other on this journey!
Bless,
Mandy


Friday 24 May 2013

REVIEW!!! Maybelline Mascaras

I recently got all three of these mascaras. Check out my previous post on my haul!

Yes, I know, I'm late to the party, but I could never find these in Barbados.
But here's my review on these three bases on my experience with them over the last few weeks.


Mayebelline The Falsies Volume Express Waterproof 


Maybelline The Mega-Plush Volume Express


Maybelline The Falsies Volume Express Black Drama Waterproof


Needless to say, since I am a mascara lover (because I have wimpy, pathetic little eyelashes), these were the first things I busted open to try.

The photos above (borrowed from the internet - thanks google!) are actually in order from my favourite to my least favourite.

Of course every company makes ridiculous claims about their products. Maybelline claims that with these mascaras you'll get lashes that look like Christy Turlington's in the photo. Bear in mind she's wearing several layers of actual false eyelashes. It's a mascara ad!! 

So I'll break each one down by what they claim, what I found in my experience using them, and what I love or don't love about them. For the  product claims I'm going from the Maybelline website because since these were brought in for me by friends, the packaging was removed to avoid customs charges.

The Falsies
The Claim: 300% more visible lashes, corner to corner. Special 'spoon' brush (read: a curved brush which has been 'flattened' so the bristles are shorter in the belly and underside of the curve and longer on the sides) and flexible wand.

By "visible lashes" I assume they mean both longer and thicker, and therefore easier to see?

I prefer waterproof mascaras because they hold the curl better in my lashes because they dry quickly. I don't know what the washable version of this mascara is like, but this one is the absolute BOMB.

The first time I tried it was on uncurled lashes, and I was astonished by how suddenly my lashes were curling upwards! At first, I applied this mascara kind of the way that you're supposed to apply the lash stiletto, constantly pushing the wand through , turning it to get more product as opposed to putting on several coats. I've also used it in coats, though, and I still don't get any clumping problems. 

I like the curve of the brush and though I was skeptical about the longer-shorter-bristle thing, it seems to be a good call because it is easier to get into the corners and on the lower lash line with the shorter bristles. 

It's the formula of this mascara that I love. It's on the thinner side, which means it doesn't really clump, but it dries quickly.

Wearing The Falsies (One coat!)


I'm also a fan of lots of lower lashes, and this mascara gives me lower lashes รก la Kim K.

The lashes don't feel too hard or too thick, but they do look thick. 

My only cons with this one is that I don't know if I like the flexible wand, it just doesn't feel stable to me, and also The Falsies is honestly is a bitch to remove. But with everything else it has going for it, this is my new favourite mascara.


The Falsies Black Drama
The Claim: Extreme matte black. 300% more visible lashes, corner to corner, no gaps. Spoon brush, flexible wand.

This one is my least favorite in the bunch. 

It is very black, and very matte. It does make my lashes look much thicker along the base of the lashes. 

I don't know what the matte finish has done to the formula, but this mascara seems very dry and powdery to me. I know quick-dry mascara is supposed to be a good thing, but this dries TOO fast. It almost comes out of the tube half-dry. As a result, I find that it gets clumpy on me before it does any lengthening at all. The "no gaps" thing is crap. Your lashes will ALWAYS have gaps. That's why they're called lashes, not 'fur'.

Wearing Black Drama (two coats)

This mascara doesn't hold the curl as well as The Falsies, maybe because the dryness makes it a little heavier. Again, it thickens at the base but it's very hard to get it moved through the lashes properly, and I really don't feel like I get the length.

This doesn't give me the lower lashes that I'm after either, again because of the dryness of the formula. Same peeve with the flexible neck and the difficulty to remove. Perhaps the brush should be different? It's the same spoon brush but maybe the combination of the dry formula and the spoon brush just don't really work together and well as the brush works with the original Falsies.

I know I sound critical, but this is a good mascara, great for thickening, and it really is a lovely inky black. So perhaps if you already have long lashes, or if you're using it to marry your own lashes to a strip of real falsies, this might work beautifully


The Mega-Plush
The Claim: Mega volume, gel-mousse formula, never brittle or flaky.

I like this mascara. the gel-mousse formula is thin, and I find that it dries quickly, and hold a curl nicely.

I don't find that it gives mega-volume though. I found the volume and lengthings to be a little less than The Falsies, to be honest! But Mega-Plush does lengthen and thicken. It doesn't clump too much either. It's decent on the lower lashes, but I've been spoiled by the Falsies.

Wearing The Mega-Plush (two coats)

I think the brush doesn't need to be quite so fat, and this one has the most flexible neck of all. It makes me feel like the brush is going "doiiinnnggggggg" every time I pull it through my lashes. LOL!

But I do very much love the gel-mouse formula. I wear this mascara during the day or for more natural looks like in the pic (I wasn't wearing foundation or eyeshadow!). It is quite clean, and I love that it doesn't really clump, even after a few coats. 

Also, somehow, this mascara is also hard to remove. It's not just water-washable.


All in all I do like these mascaras, I think they're awesome drugstore buys, and I would buy them all again. they have their pros and cons, but I think The Falsies (the original) is the best mascara I've tried recently.

Hope that was helpful!

Do you like my reviews? Should I do more?

Blessings and lots of lashes!
Mandy